Myriad RF for Arduino
Arduino is one of the most well used and popular open-source electronics prototyping platforms available. Like Myriad RF it’s based on flexible, easy-to-use hardware and software and is suitable for both the experienced and hobbyist user.

With this in mind we’ve take a look at how you can use the Myriad RF open source communication hardware to give mobile communications connectivity to Arduino projects. In addition to prototyping, we feel this could be of great use in creating a vast range of M2M or energy monitoring systems or, indeed, for use in weather balloons.
Connecting the boards:
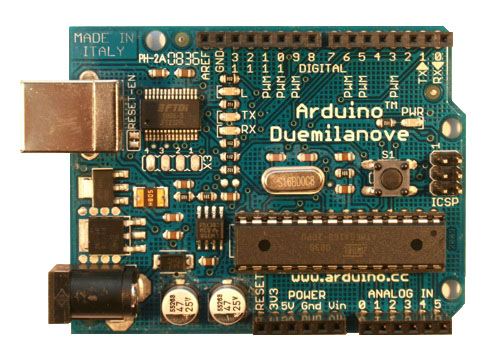
We’ve used an SPI interface between the Myriad RF (free database / purchase board) and Arduino board (in this case the Arduino Duemilanove board). This combination enables the Myriad-RF board to be controlled via SPI interface directly, using PC software and any type of Arduino platform.
Because there are a plethora (or a myriad, rather) of Arduino boards available we’ve given full instructions for connecting the boards here.
For the Duemilanove board, simply connect the Myriad’s X9 connector to the Arduino’s digital pins (J3) linking Myriad pin 1 – Arduino GND (GND); M2 – A9 (Reset); M3 – A10 (NCSO), M4 – A13 (CLK), M5 – A11 (MOSI), M6 – A12 (MISO).
The Arduino sketch
Connect the Arduino board to the PC via a USB cable.
The first step in getting the software up and running for the Myriad-RF and Arduino is to load the sketch “usb_spi” to the Arduino board (download zip file). Select the correct board type (“Tools -> Board”) and Com port (“Tools -> Com port”). Then go to “File -> Upload”.
This usb_spi Arduino sketch translates commands, transferred from software running on the PC, to Myriad-RF board. Once uploaded the communication between elements should be tested – see section 3.2.1 to 3.2.3 of the linked document to see how to do this along with information on Myriad-RF reset commands and SPI read/write commands.
Configuring the transceiver
The final step is to configure the transceiver to run on the desired frequency band and communications standard. With the Myriad / Arduino system connected to the PC via USB run the transceiver GUI (download zip file here). In options -> communication settings set SPI clock frequency to 0.125 MHz , which specifies a baud rate of 115200 – needed for communication with Arduino boards. Then Register a test from the tools menu.
And there you have it, mobile communications functionality for Arduino projects.
