We were honoured and extremely privileged to have received the first Novena Laptop off the production line! In this post we take a look at the final assembly which needs to be done upon receipt of the laptop, including fitting the Novena-RF module and bulkhead mount RF connectors.
Please note that this is not meant to be a comprehensive assembly guide and you are strongly advised to consult the official guide on the Novena wiki before attempting assembly!
Contents

The Novena Laptop came supplied in a fairly unassuming cardboard box.

However, upon opening the box, removing the contents and discovering a printed set of schematics, it quickly becomes apparent that this is no ordinary laptop!

A smaller box could be found inside which contained a mains charger, fixings, thread lock, loudspeakers, an SD card “fuzz” adapter, various other hardware and, of course, the RF module.
One nice touch was the inclusion of hand tools, with another being that a blank “port farm” panel is provided for use with custom projects.

The laptop itself came supplied mostly assembled, complete with battery pack and SSD etc. in place and cabled up. The wiki guide takes you through the process of fitting the LCD — and attempting this is strongly discouraged until you have read the caution on handling the rather fragile panel.

The LCD can be seen above in its protective packaging, along with a second display bezel that is green instead of blue and with an extra cut-out for expansion cards that require this for I/O ports.
Fitting the RF module

Before the Novena-RF module could be fitted the General Purpose Breakout Board (GPBB) had to be removed from the main board expansion port.

This involved lifting the Kapton tape which had been used to secure the WLAN antenna coax to the GPBB, before removing the three screws securing the board and then the board itself.

We decided that we wanted to cable the RF module up to bulkhead mount SMA connectors, and to locate these on the front of the laptop enclosure where there is a removable panel, with the module situated just behind this. Calipers were used to mark out the panel reverse with the drill centres.

The SMA connectors were then fitted, the panel replaced and the U.FL connectors attached to the RF module.

Fitting the screen

Care is required in fitting the screen to ensure that it is not damaged. Completing this step didn’t take very long at all, nor was it difficult, but it should not be rushed.

With the LCD fitted it became apparent that its metal backing would be quite close to the top of the 0.1” pitch header pins on the RF module when the laptop is closed. So with this in mind Kapton tape was used to cover the pins to prevent shorting. It may be that this was not strictly necessary, but at this point we’d recommend taking similar measures just to be on the safe side.
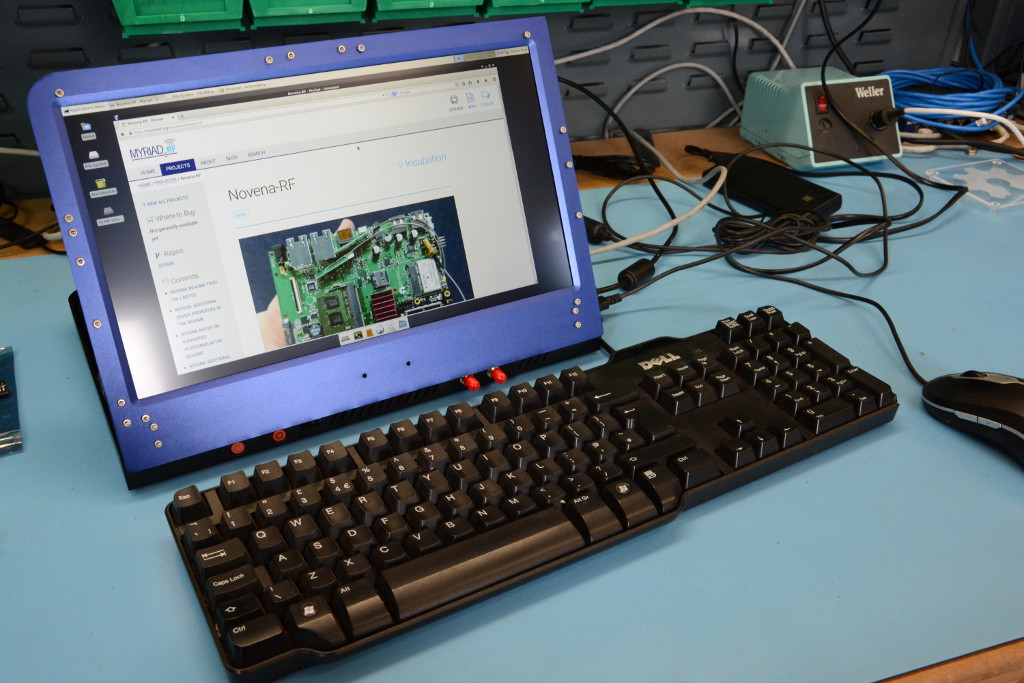
First boot!

As soon as the Novena was powered on it booted straight into setup for Debian GNU/Linux. A few basic questions concerning locale etc. out of the way, we were up and running with a graphical desktop. The first job then being to run update to get the latest versions of installed software.

SDR support
Josh Blum is in the process of developing:
- FPGA support for the Novena-RF module and an accompanying kernel driver
- SoapySDR host wrapper and GNU Radio support via gr-osmosdr
- OpenBTS/OsmoTRX support
The FPGA design and kernel driver, along with host wrapper and GNU Radio support, have now largely been completed. However, there may still be a few bugs and opportunities for minor improvements. Those who would like to try this out now can find further details in the Novena-RF GitHub repo, and there will be another post on this here in due course.