This is the first in a series of posts on the LimeSDR platform, that aim to demystify using SDR in the real world and programming a simple example with confidence, through bite sized chunks.
What is SDR?
Most that have found this article will already know the answer and to use an analogy, while a traditional solution might be to use a flat bladed screwdriver, SDR would be a multi-tool consisting of a full screwdriver set, saw, socket set and a drill press to boot.

This doesn’t actually explain much and so Wikipedia has a good definition:
“Software-defined radio (SDR) is a radio communication system where components that have been typically implemented in hardware (e.g. mixers, filters, amplifiers, modulators/demodulators, detectors, etc.) are instead implemented by means of software”
In reality there is so much more to SDR than can be put into a single sentence and not all that is possible is not yet known; with the technology still being relatively new the limits are still being explored. Software and hardware are flexible, e.g. the implementation doesn’t need to be software it can be flexible hardware, like a CPLD or FPGA, or alternatively implemented via an ASIC. Even a hybrid where some parts are hardware some software. The key word is flexibility!
Where is it already used?
You may be thinking, but SDR is a next generation solution and I’ve never heard of it — is anyone even using it? Well there are millions of software defined radio’s all over the world. There may be one in your living room right now!
Having a background in Set Top Box (STB) industry, there has been a defining trend I’ve observed of fixed tuner/demodulators fading over time, in preference of “Full band capture” front-ends. Most high-end set top boxes being developed will be implementing such a device. How is this relevant? Well in essence a “Full/Wide band capture” front-end is an SDR. The traditional front-end IC has been replaced with an ADC and DSP equivalents of the traditional blocks.
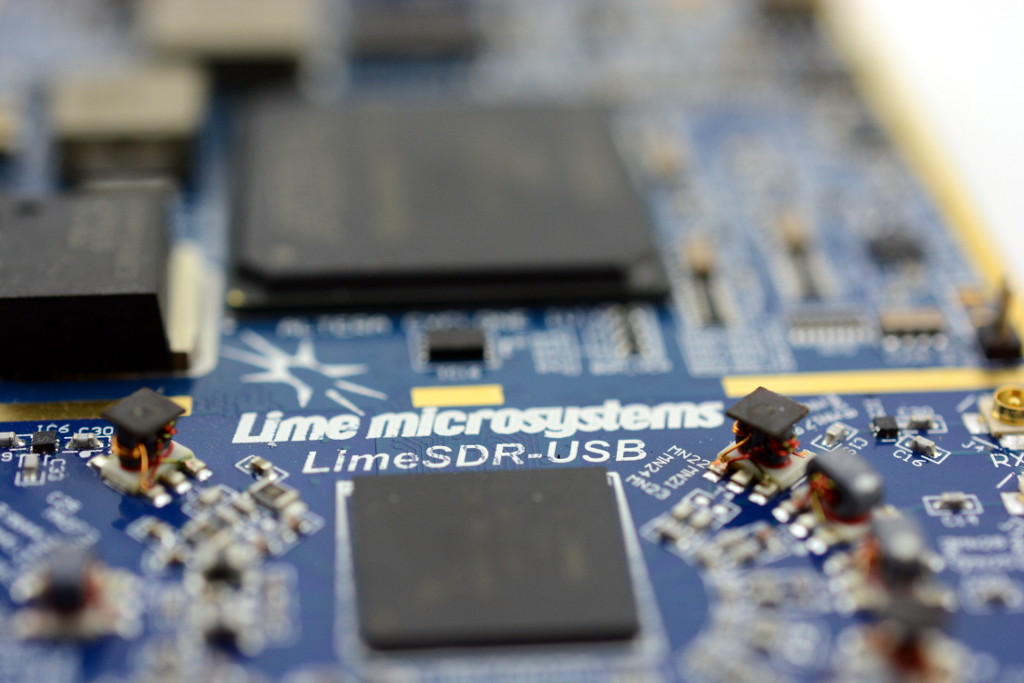
LimeSDR
While there are many SDR offerings available, there are few that are both as capable and cost-effective as the LimeSDR. The LimeSDR board provides most of everything needed to get up and running for applications within the 100kHz to 3.8GHz frequency range.
If the term flexibility has not already been exhausted, these are just a few of the applications the board is capable of supporting:
Cellular, Wi-Fi, Bluetooth, IoT protocols (LoRa/SigFox etc), navigation, meteorological information, aeronautical, marine, space communication, and lets not forget broadcast radio and TV. This is a small proportion of the radio traffic that the LimeSDR could be configured for use with and the main limit is the imagination.
So we know LimeSDR is a low cost, open source, apps-enabled software defined radio (SDR) platform that can be used to support just about any type of wireless communication standard. This means because LimeSDR is fully open source, all hardware and software is fully available to be studied and modified. Schematics, layout, BOM & software are available under Creative Commons and Apache 2.0 licences .
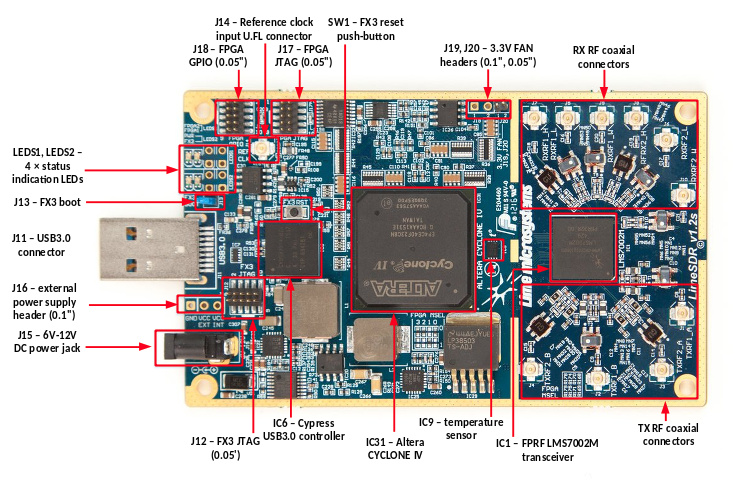
At the heart of the LimeSDR is a LMS7002 a “field-programmable RF IC”. To over simplify a description of the LMS7002: it is an RF FPGA analogue. As this series of posts goes on we’ll dig into the LMS7002 a little more, unveiling many of the functions it performs.
RF connections
The LimeSDR has two receive/transmit pairs which can be used in anything from Rx only to a 2×2 MIMO. Looking at the RF connectors we notice there are 10 in total, but only 2 Rx and 2 Tx available in the IC why? To provide performance improvements for certain frequency ranges there are ports provided for Low and High band RX/TX (8 of the 10). In addition there is a wideband RX channel that covers the final two ports. It would be very difficult and a comprise (possibly too far) to provide a single RX/TX port per channel, by providing multiple channels for specific frequencies the both flexibility and performance is retained.

Specifically the ports are matched for the following frequencies out of the box:
- TX1_1/TX2_1 = Broadband
- TX1_2/TX2_2 = Broadband
- RX1_1/RX2_1 = Low band specific < 1.5GHz
- RX1_2/RX2_2 = High band specific > 1.5GHz
- RX1_3/RX2_3 = Broadband 100kHz to 3.8GHz
While this is the default design of the input matching stages, it can be altered. This is a relatively advanced task and it is best to understand this process fully before attempting a change.
A second point to note is that with any flexible solution there are always some compromises; the system is designed with a wide range of applications in mind and therefore is tuned for maximum flexibility.
The broadband RX port performance is likely going to be worse than a high or low band specific port for most applications, and the low/high band port is far from narrowband so may need some modification for specific applications. E.g. where additional sensitivity is required at specific frequencies. An example of these would be the quick fix for HF use by Danny Webster.
Other connections

On the opposite end to the RF section is a USB 3.1 port and optional power connector. In most cases the lime SDR can be run from USB power, although note that it does require more than the USB2.0 500mA specification. While most USB 2.0 devices will provide sufficient power it is not guaranteed and may cause issues. If possible use a USB 3.x port as this standard is specified to guarantee 900mA of current. The USB 2.0 port may also limit applications due to bandwidth so USB 3.x is recommended.
While on the subject of power, additional power amps may be required for some applications, but a low power radio can be run without additional hardware.
For applications around the 2.4 GHz spectrum note that USB3.x has significantly large harmonics, that poor shielding on the cable/PC can increase the noise floor to a point where communication is impossible. This is most commonly seen in WiFi where USB 3.x can disrupt a laptop/tablet connection. If this is an issue consider using USB2x (lower bandwidth) or providing more shielding.
USB control

Cypress USB 3.0 CYUSB3014-BZXC (EZ-USB FX3). This device is programmed with VID/PID’s and will enumerate to the LimeSDR driver. All code is provided for this device, so if a specific use case is required this part can be reprogrammed as required.
Note that on windows when fully enumerated the device in device manger will show up as “Myriad-RF LimeSDR-USB” not “LimeSDR”.
Connector J19 maybe of interest for some applications. This is a set of 8 generic GPIO’s these can be driven from the API as both input and output. Care must be taken with use as they are driven from the on-board FPGA, which has relatively low drive current I/O and is 3.3V only.
Additionally it is recommended to self power any device connected, while a 3.3V supply is provided this is for low current draw only.
The last two connectors on the board are two JTAG connectors however these will not be of use to most users — only advanced use cases would need to consider these connections.
FPGA glue

Finally the last major piece of the LimeSDR is the Altera Cyclone IV this provides some back end processing, waveform player and glue to make the whole device work.
As with the EZ FX3, the code for the FPGA is provided free of charge and under the Apache 2.0 licence, and can be used to generate a custom firmware if required for the desired application.
Where to start
If you haven’t already get yourself a LimeSDR over at Crowd Supply
Next follow the tutorials to get Lime Suite and if required, Pothos, installed (Windows users will require the PothosSDR installer). Note at the time of writing the install instructions are in the process of being updated as a few items have changed since the tutorial was written.
Finally, follow a few examples like the quick test.
What is all of the software?
As with the the LimeSDR hardware, the software provides a lot of flexibility and options for programming. These can roughly be split into three categories:
- Beginner (GUI/simple)
- Intermediate (code API’s)
- Expert (low level code API)
For the latter in-depth knowledge of the LMS7002M is required. The aim of this series is to get towards this level through a series of easily digestible chunks.
More information about SoapySDR which is the recommended starting point is available in a previous post.
In the next article in this series we will move onto the RF input and LMS7002 in a little more detail, to help demystify some of the many controls available in Lime Suite.
Karl Woodward